Audio Description
Create an Audio Description project
When creating an Audio Description (AD) project, follow these steps.
1. Select the project type
Choose Audio Description when creating the project.
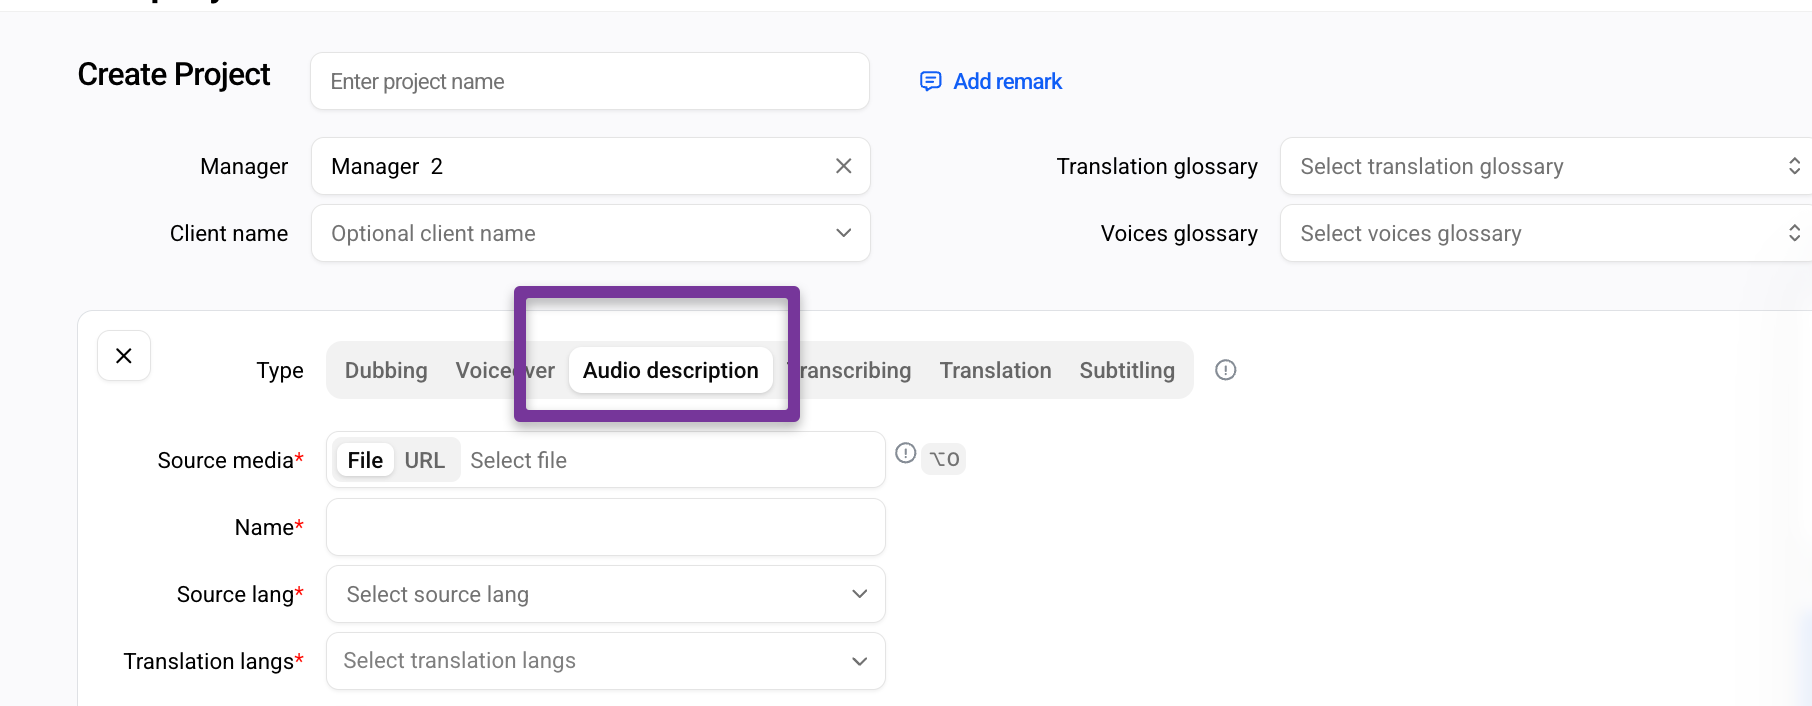
2. Upload the source video
Upload the source video file and provide a clear, recognizable file name.
3. Set the source language
Specify the original language of the video.
4. Select the target language
Choose the target language(s) for the final result.
By default, the target language is the same as the source language, as Audio Description is typically created in the language spoken in the video.
5. Upload supporting materials (optional)
You can upload additional files that may help during the AD process, such as:
M&E (Music & Effects)
International mix
Vocals audio
Any other relevant materials
6. Create the project
Click Create project.
After the project is created, one Audio Description (AD) task will be generated automatically.
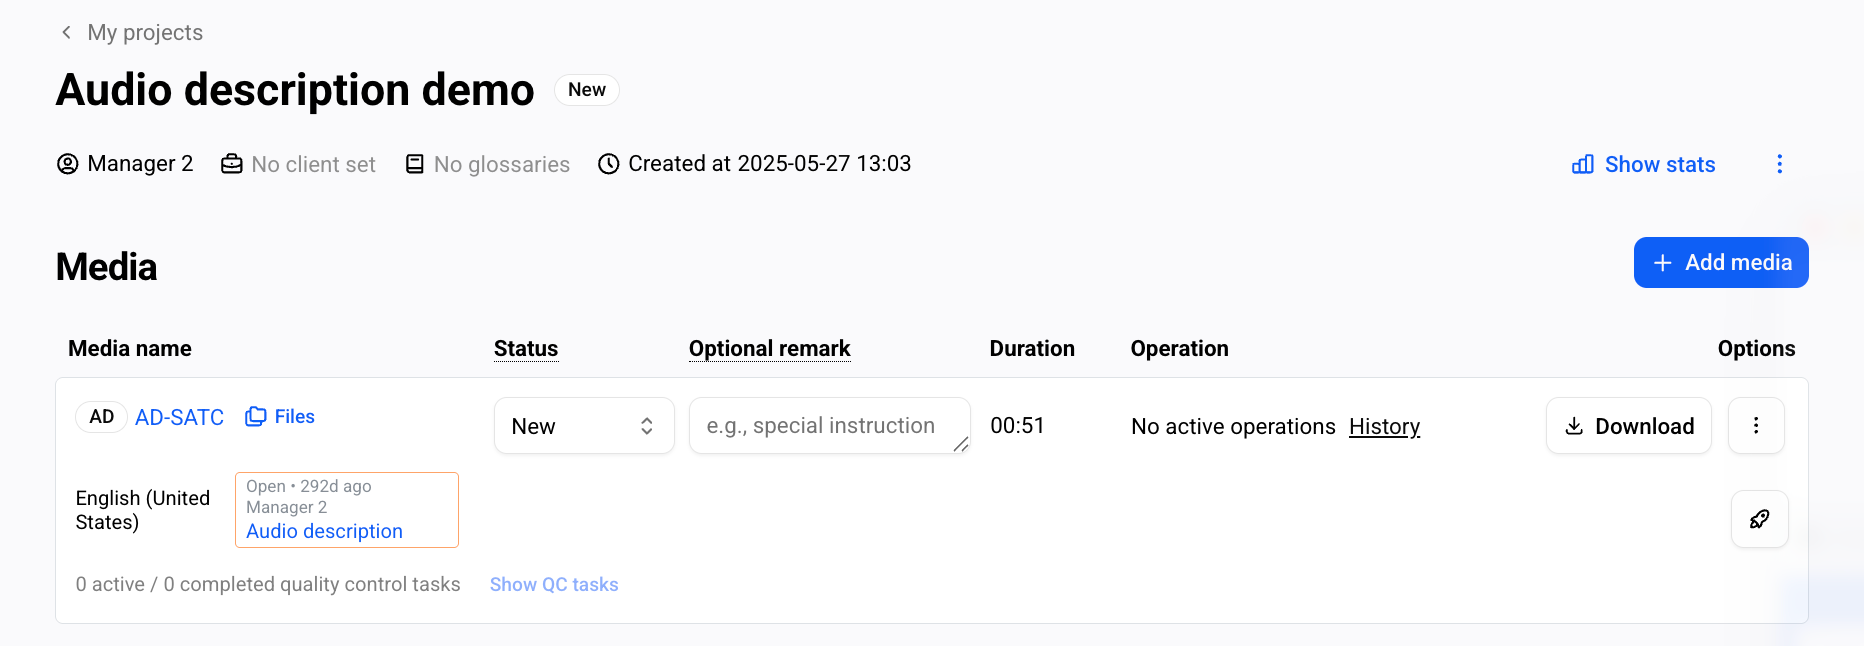
Working inside the Audio Description task
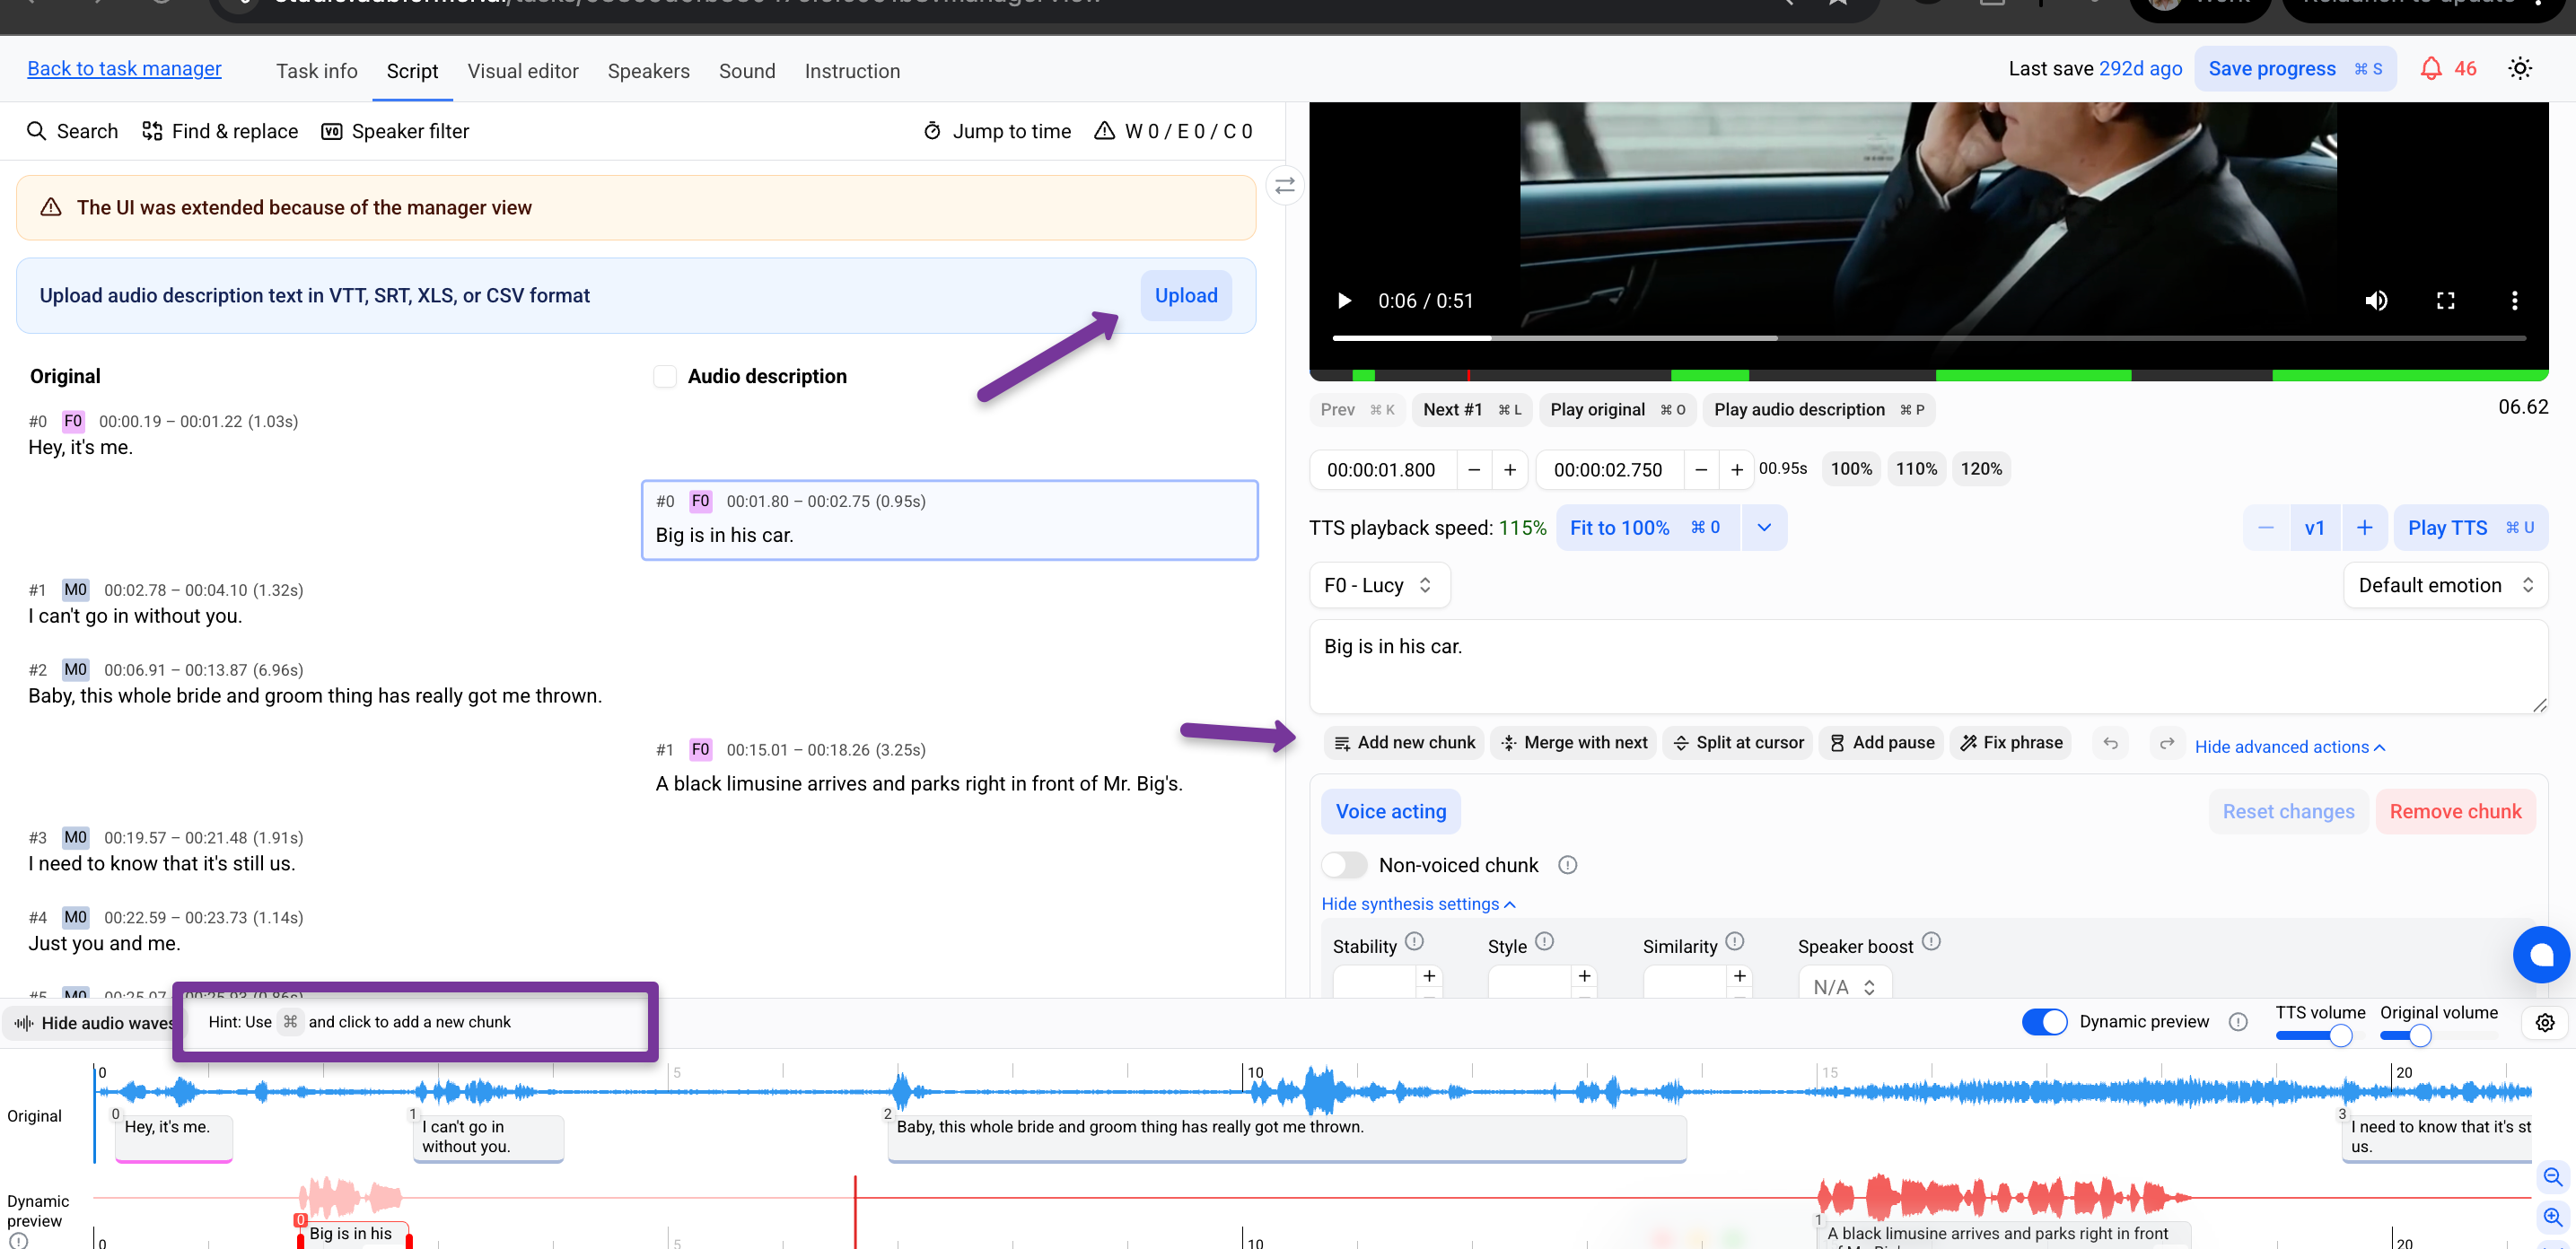
Inside the task, the right panel displays automatically recognized speech (ASR) from the video.
This transcript helps you navigate the timeline and identify the appropriate moments for inserting audio description.
The ASR transcript is read-only and cannot be edited.
Uploading a script as Recorded Script is currently not supported.
Adding Audio Description text
To add audio description text, you can use one of the following methods:
Add chunks manually
Click Add new chunk to create a new description segment.
Create chunks directly on the waveform
Use the keyboard shortcut shown in the interface to add chunks directly on the waveform while watching the video.
Upload an AD script
Click Upload and upload a prepared Audio Description script.
Note: Translation tasks are not currently supported in the AD workflow.