Voices Glossary
Use a Voices Glossary to define which voices are used for specific speakers across one or multiple projects. This ensures consistent voice assignment throughout the pipeline.
Create a project with a voices glossary
Step 1. Start creating a project
Create a project as usual:
Upload source files.
Select source and target languages.
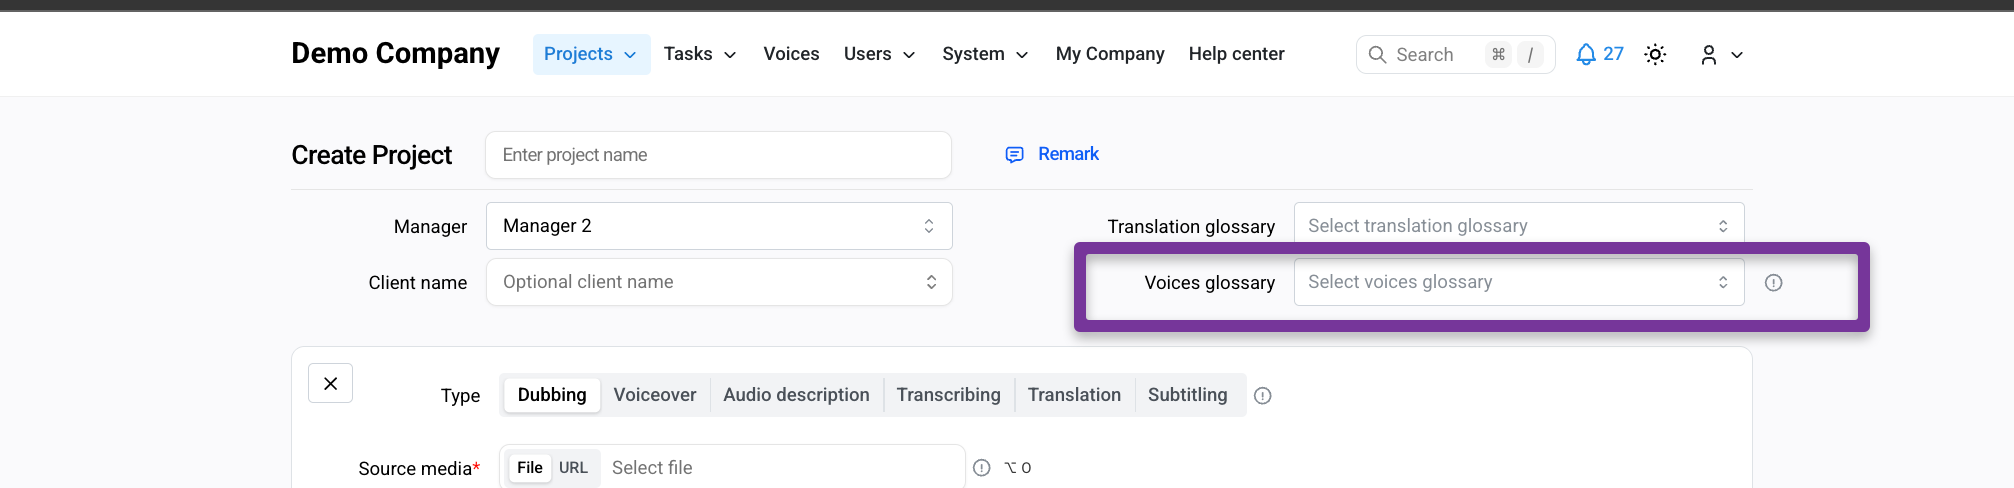
When prompted, select Voices glossary.
Step 2. Create or select a voices glossary
Create a new glossary or select an existing one.
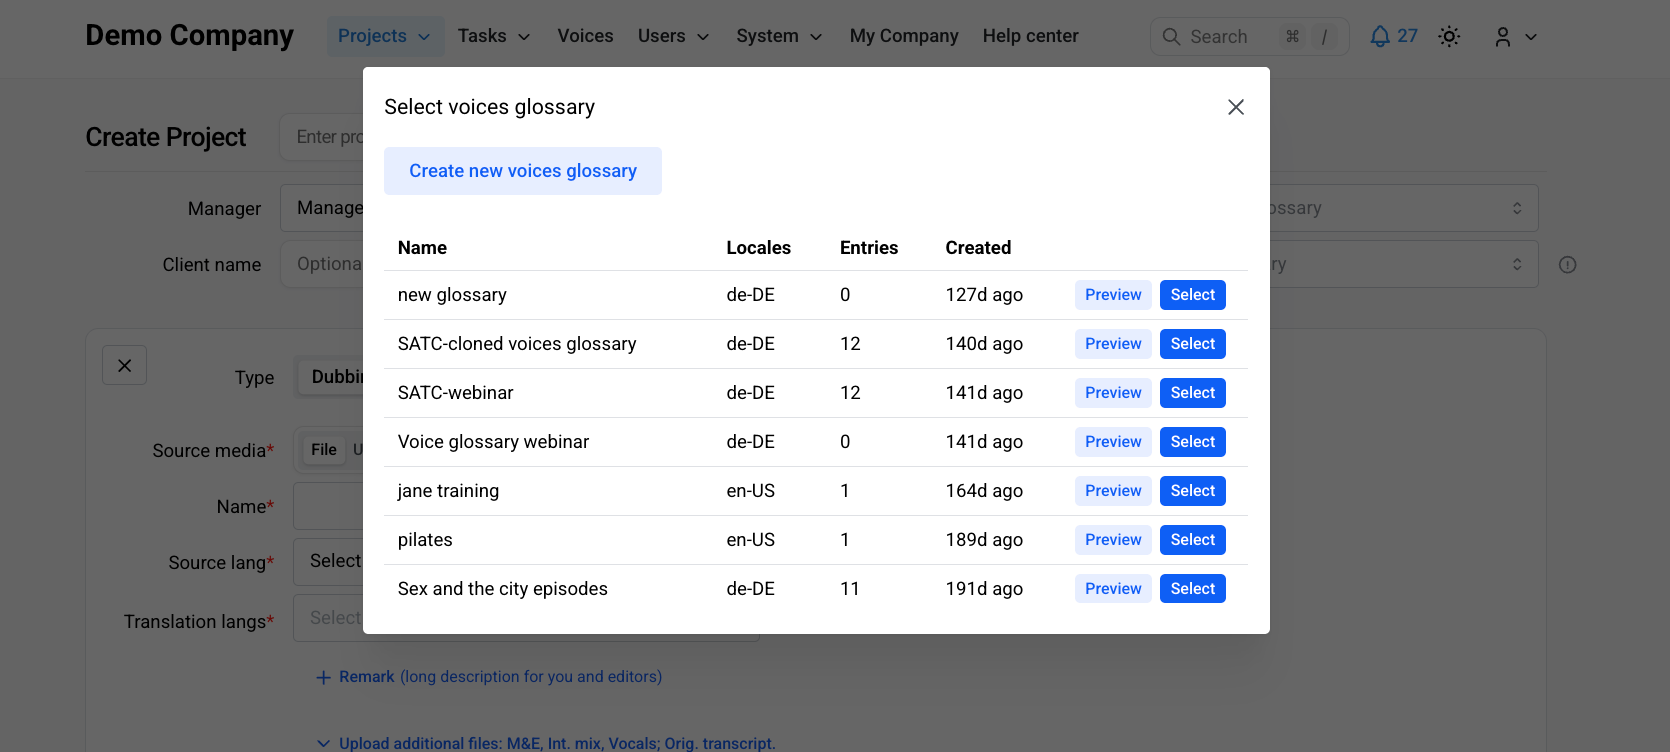
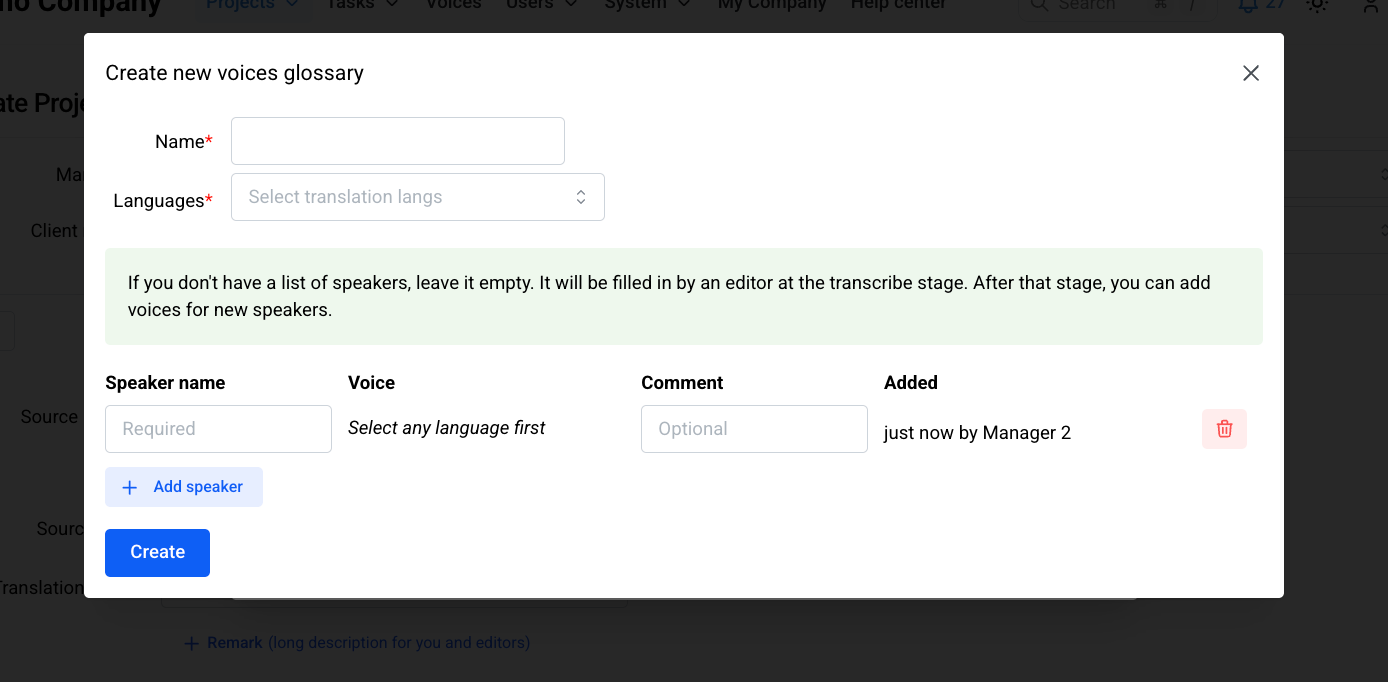
Enter a clear, descriptive name.
Select the target language(s).
If you do not have a speaker list yet, leave the fields empty.
The assigned Transcriber will define speakers during the Transcription task.
Note:
When using a voices glossary, speaker names must be assigned during the Transcription task or provided in the uploaded original script.
Step 3. Save the glossary
Click Create to save the glossary.
Step 4. Enable automation (optional)
Scroll to the Automations section:
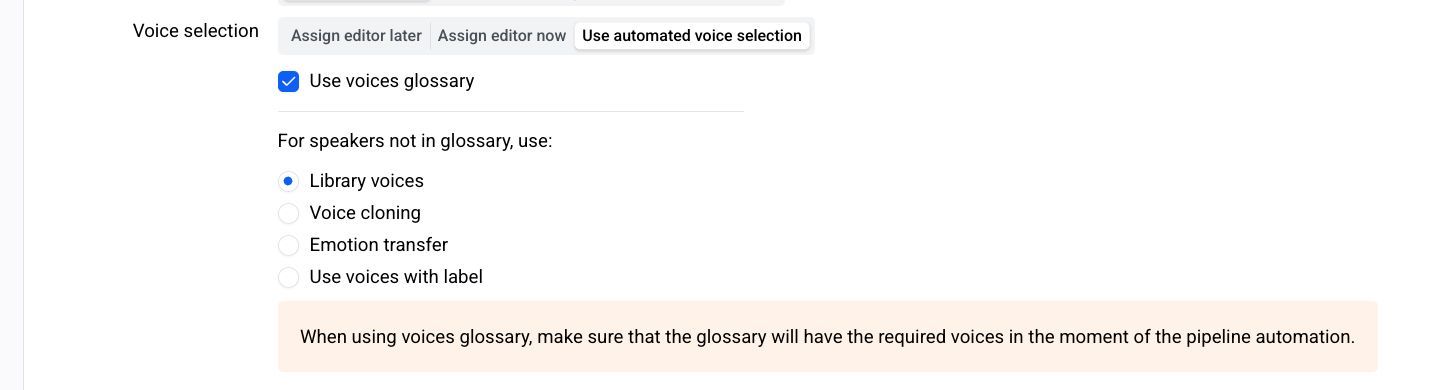
Enable Automate voice selection task.
Select Voices glossary.
Select which voices should be applied to speakers that do not have a matching entry in the voices glossary.
This automatically assigns voices based on the glossary.
Step 5. Create the project
Click Create project to complete setup.
The voices glossary is now available in the Voices tab of the project.
Assign speakers during the Transcription task
Step 1. Open the Transcription task
Either:
Create and assign the Transcription task to an Editor, or
Open the task in Quick Preview mode.
Step 2. Assign speakers
During transcription:
Assign a speaker to each chunk.
Reuse existing speakers by selecting them again.
Editors can add new speakers to the glossary during Transcription or Translation.
This allows you to start with an empty glossary.
Step 3. Complete transcription
Once finished, save the task and send it to review or process it.
Assign voices to speakers
After speakers are defined, assign voices in the project.
Step 1. Open the Voices tab
In the project view, check how many speakers still have no assigned voices.
Step 2. Edit the voices glossary
Open the glossary.
Select a voice for each speaker in each target language.
Step 3. Save changes
Click Save changes to apply voice assignments.
Use a voices glossary without automation
If voice selection automation was not enabled:
Step 1. Open the Voice selection task
Go to the Speakers tab.
Step 2. Apply the glossary
Select Use voices from glossary.
Save your progress.
Result
After Translation and Voice Selection are processed, the next task (Prooflistening or Lip-sync) becomes available.
Verify voice usage
Open the task or use Quick Preview.
Go to the Speakers tab.
Confirm that voices are taken from the glossary.
Open the Script tab and play chunks to review voice assignment.
You can now continue working on Prooflistening or Lip-sync.
Note:
Voices glossaries can be reused across multiple projects.
You can select an existing glossary when creating a new project or create a new one at any time.