Dubbing Workflow: Creating and Completing a Project in Studio
This guide explains how to create a dubbing project in Dubformer Studio and move it through all production stages — from media upload to final delivery.
Create a new project and upload media
Step 1. Open the Projects page
Go to Projects and click Create new project.
Step 2. Set up basic project details
Fill in the required fields:
Project name
Manager / Editor (yourself or another user)
Project remarks (optional)
Configure a dubbing project
Step 3. Select project type
Choose Dubbing as the project type.
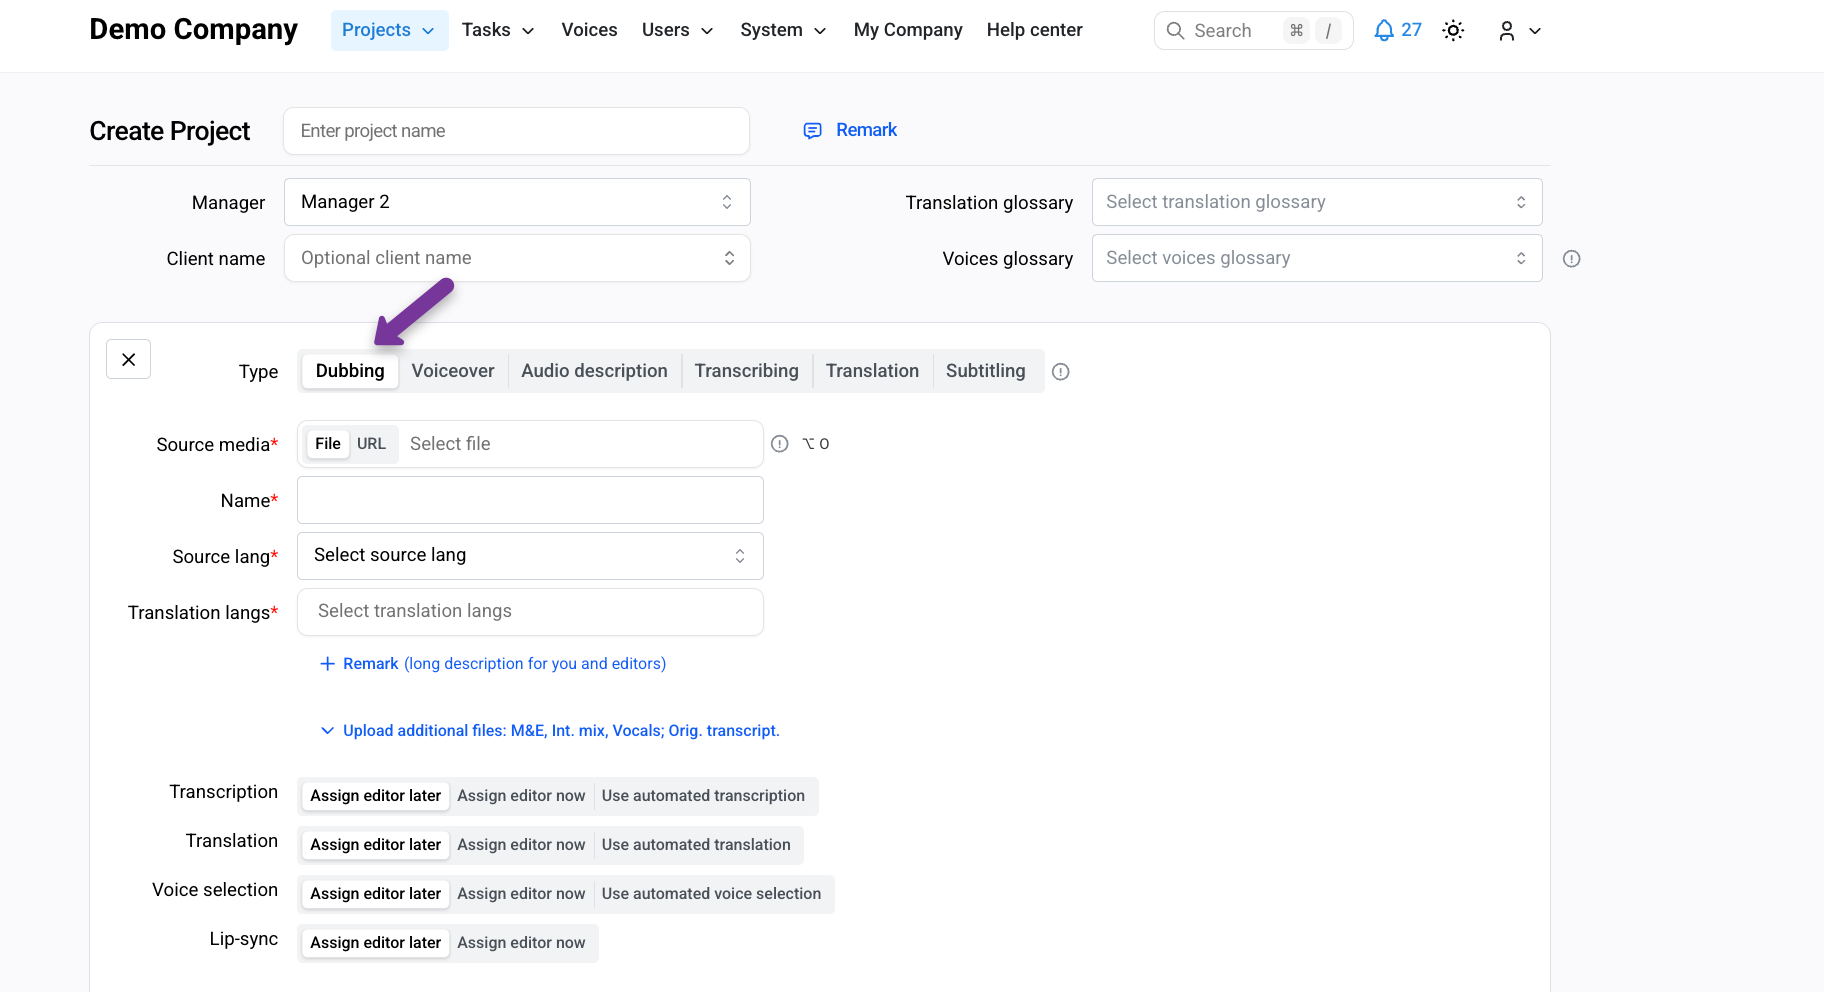
Dubbing is used when the original voices are fully replaced by synthesized voices in the target language.
Accurate lip sync is critical for natural visual alignment with on-screen speech.
Step 4. Upload source files
Upload and configure:
Source video file
Source (original) language
Target language(s)
Optionally upload:
M&E or international mix
Original vocals
Original script
Step 5. Configure automation (optional)
You can enable automation for:
Transcription
Translation
Voice selection
When enabled, AI-generated results are used as final outputs without manual editing.
Step 6. Create the project
Click Create project.
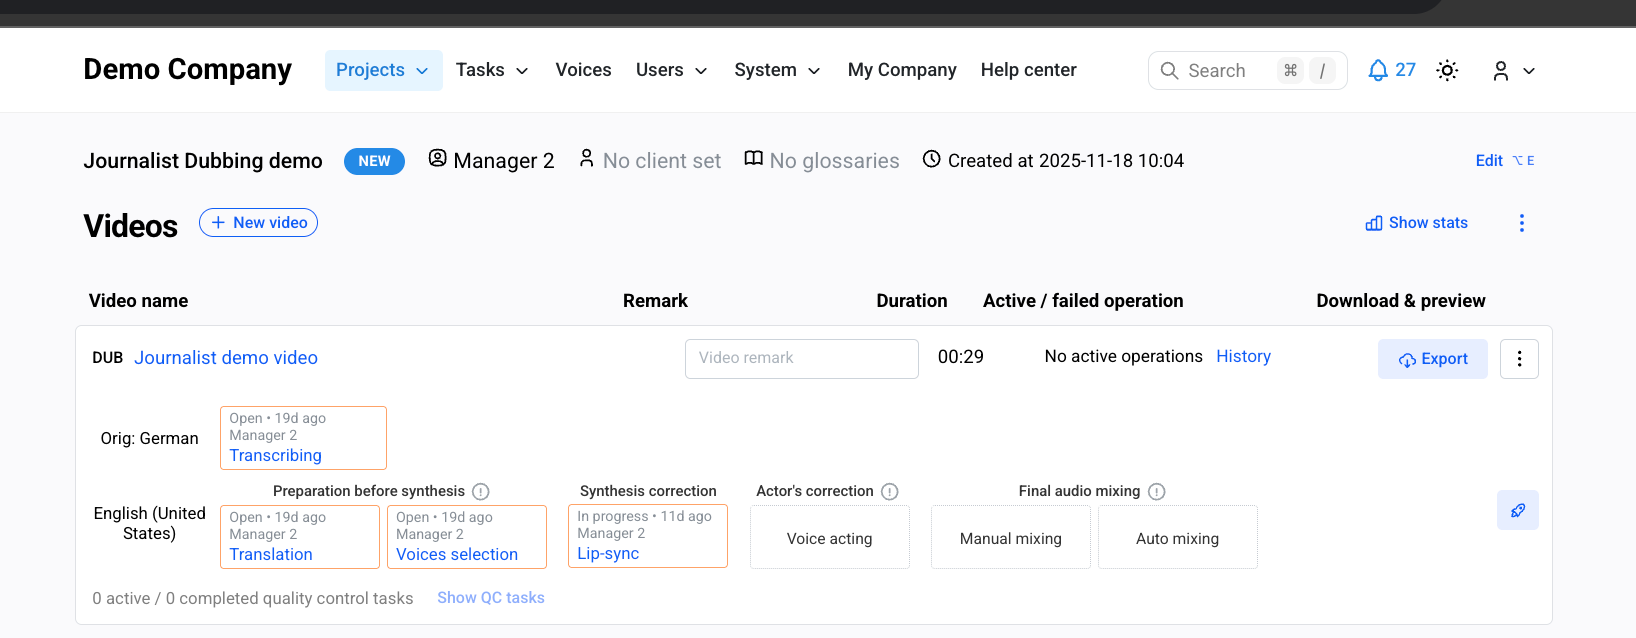
The project now appears in Studio.
Create and complete tasks
Each dubbing project follows a structured pipeline. Tasks can be created manually or opened in Quick Preview mode.
Transcription task
Step 1. Create or open the task
Create a Transcription task or use Quick Preview.
Step 2. Assign an editor
Select an assignee from the dropdown.
Step 3. Review instructions
Open the Instruction tab and read task guidelines.
Step 4. Work on transcription
Start working
Edit transcription and speaker tags if needed or upload your original script
Save progress frequently
Step 5. Process changes
Send the task to review or click Process changes (depending on pipeline settings).
Wait until changes are applied before moving on.
Translation task
Steps
Create or preview the Translation task
Assign an editor
Review task instructions
Edit translation
Save progress and process changes
Voice selection task
Steps
Create or preview the Voice selection task
Assign an editor
Choose a voice method:
Library voices
Cloned voices
Save progress and process changes
Lip-sync task
Purpose
This task aligns synthesized speech with lip movements for natural visual sync.
Steps
Create or preview the Lip-sync task
Assign an editor
Review Prooflistening instructions (general and lip-sync specific)
Edit timing and delivery
Save progress and process changes
Mixing stage
The mixing stage controls how synthesized speech is combined with background audio.
Manual mixing
Used when a sound engineer works outside Studio.
Steps
Create a Manual mixing task
Download available audio files
Mix externally
Upload final mixed WAV files back to the task
Review the mixed result
Auto mixing
Used for automated sound balancing inside Studio.
Steps
Create an Auto mixing task
Select mixing mode and parameters
Process changes and wait for completion
Generate the final video
Step 1. Generate output
Click Generate final video (rocket icon).
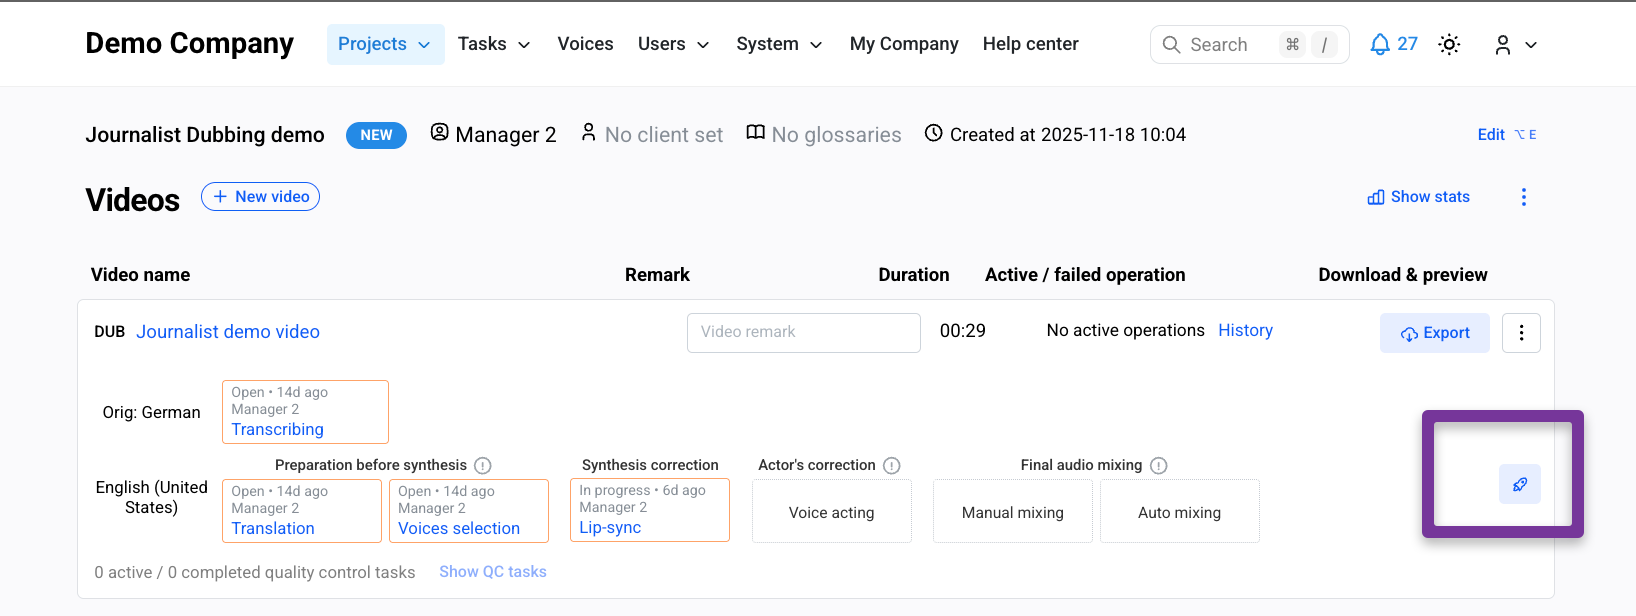
The final video is rendered in the original resolution and format.
Step 2. Access project files
Open Export to preview and download:
Final video
Audio files
Scripts and subtitles