Create a New Project
Use this page to upload source media and set up all basic project parameters.
Step 1. Open the Projects tab
Go to Projects in the left menu of your admin dashboard.
Step 2. Create a new project
Click Create new project.

Step 3. Add project details
Source media
Upload your video or audio files one by one, or drag and drop multiple files at once.
Maximum file size: 5 GB
During upload, the system compresses the file to ensure stable performance across the pipeline.
Project fields
Fill in the required parameters:
Project name — a clear title for the project.
Manager — select the responsible project manager.
Glossary — choose a glossary of terms if needed and avaliable.
Voices glossary — select a voice glossary for this project.
Type — choose the workflow type.
Name — set a unique technical alias for the video.
Original script - upload the script in the original language if you want it to be used during processing.
Step 4. Configure language settings
Source language
Select the original language of the video.
If the video contains multiple original languages, choose Multiple languages.
The system will detect all languages and include them in transcription and translation.
Translation languages
Choose one or more target languages.
Step 5. Set automation options
Use automated transcription — create transcription automatically with AI speaker recognition.
Use automated transcription — use AI translation as the final result.
Automate voice selection task — assign voices automatically.
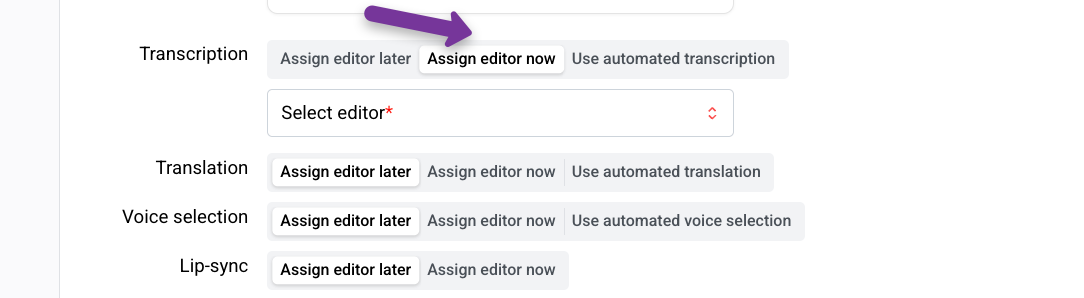
Step 6. Editor assignment
To assign editors in advance, enable Assign editor now. Select the editor and set a deadline if needed.
When the task becomes available, it will be assigned automatically.
Editors will see these tasks in their Upcoming tasks list.
Step 7. Add additional videos (optional)
Click Add new video if you want to include more videos in the same project.
Step 8. Create the project
Click Create project to complete the setup.