Voiceover Project: End-to-End Workflow in Dubformer Studio
This guide explains how to create, process, and complete a Voiceover project in Dubformer Studio — from media upload to final delivery.
Step 1. Create a new project
Go to Projects.
Click Create new project.
Enter a project name.
Assign an editor (yourself or another user).
Add project remarks if needed.
The project will appear in the Projects list.
Step 2. Upload media and configure the project
Select Voiceover as the project type.
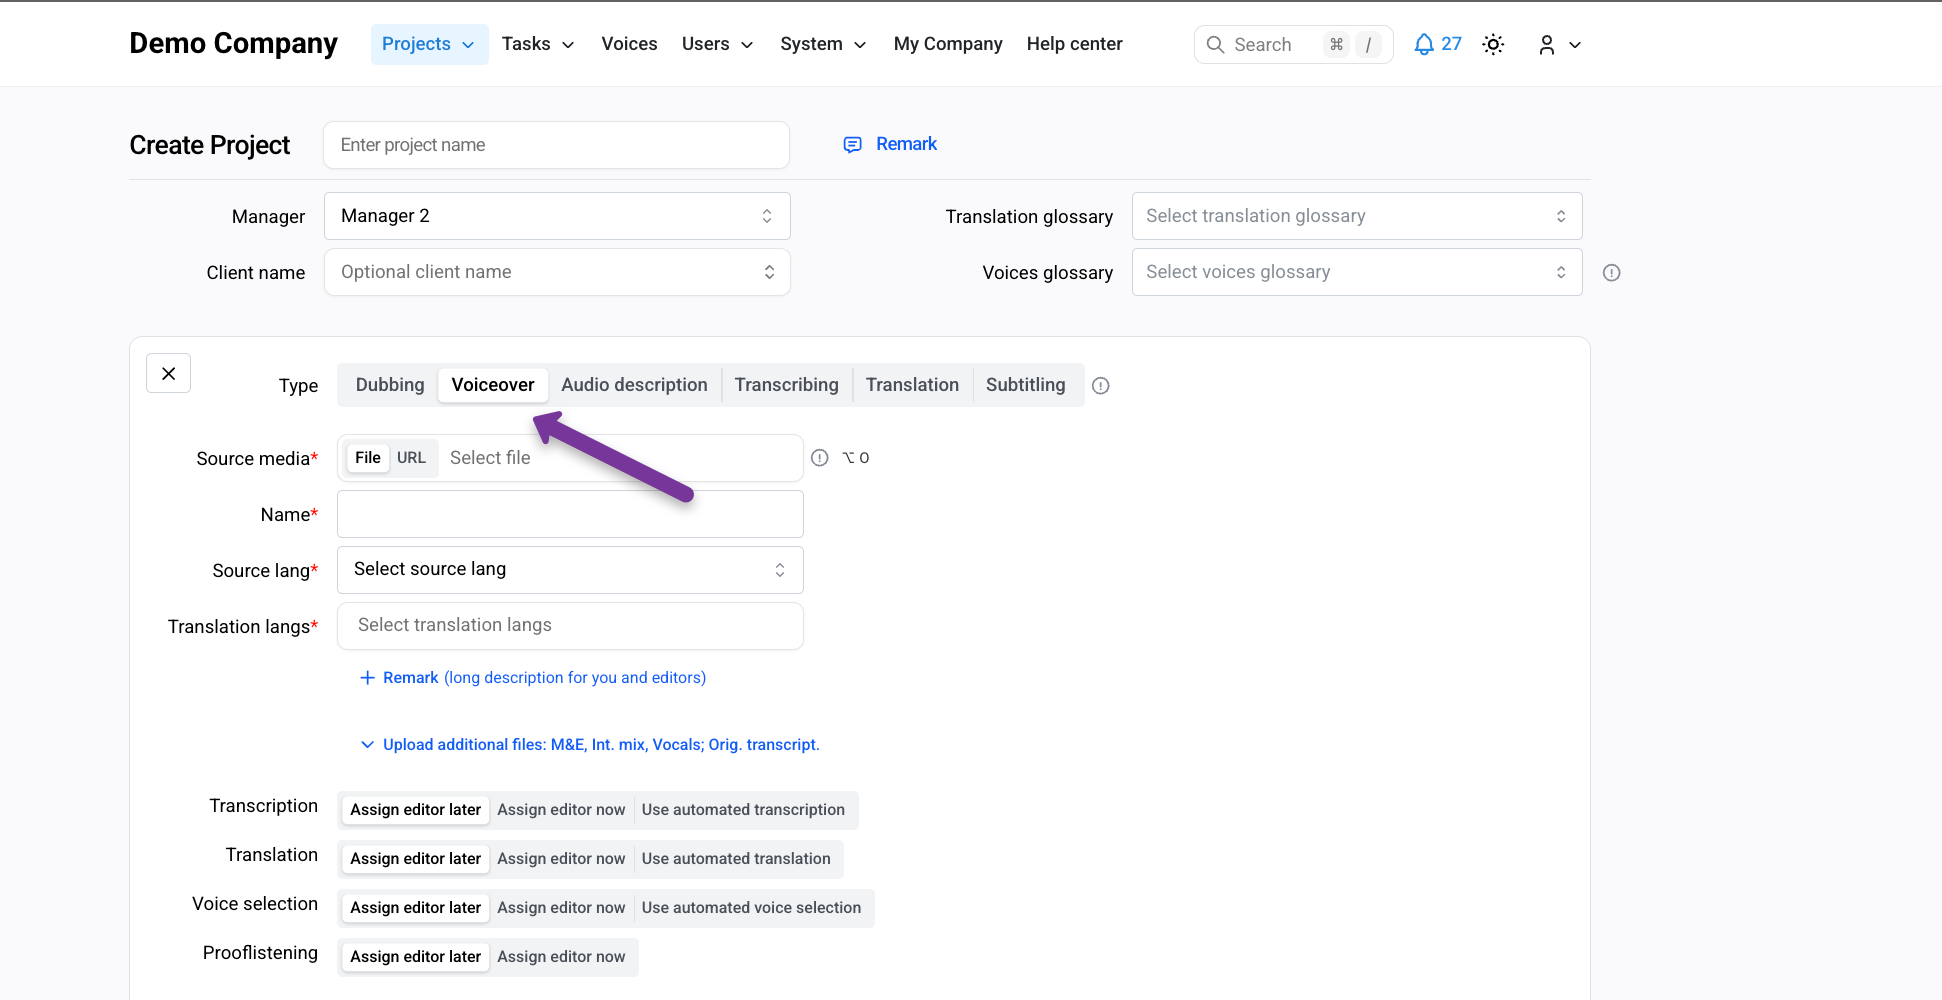
Upload the source video file.
Specify:
Source (original) language
Target language(s)
Optionally upload additional assets:
Original script
M&E or international mix
Vocals-only audio
Automation (optional)
You can enable automation for:
Transcription
Translation
Voice selection
When enabled, AI-generated results are treated as final and no manual editing is required at those stages.
Click Create project to continue.
Step 3. Transcription task
Create a Transcription task or open it in Quick Preview mode.
Assign an editor if needed.
Review task instructions.
Click Start working.
Edit the transcription if required.
Save progress regularly.
Send the task for review or process changes.
Wait until processing is complete before moving to the next task.
Step 4. Translation task
Create a Translation task or use Quick Preview.
Assign an editor.
Review instructions.
Click Start working.
Edit the translation as needed.
Save progress and process changes.
Step 5. Voice selection task
Create a Voice selection task.
Assign an editor.
Review instructions and select a voice creation method:
Library voices
Cloned voices
Click Start working.
Assign voices to speakers.
Save progress and process changes.
Step 6. Prooflistening task
Create a Prooflistening task.
Assign an editor.
Choose pipeline trigger settings if you need to hear changes before completion.
Review instructions.
Click Start working.
Fine-tune pronunciation, pacing, and expressiveness.
Save progress and process changes.
Step 7. Mixing stage (optional)
What mixing does
The mixing stage balances synthesized speech with background audio and original voices. It controls:
Volume levels
Transitions between original audio and synthesis
Track dominance
Manual mixing
Use manual mixing if a sound engineer needs to work outside Studio:
Create a Manual mixing task.
Download available assets.
Upload the final mixed audio back into the task.
Process changes to apply the mix.
Auto mixing
Use auto mixing for faster, AI-assisted results:
Create an Auto mixing task.
Select mixing presets and parameters.
Process changes.
Step 8. Generate the final video
Click Generate final video (rocket icon).
Wait for processing to complete.
Step 9. Download results
From Export, you can:
Preview the final video
Download the final video and related assets
Result
You now have a completed Voiceover project with:
Translated and synthesized speech
Optional professional or automatic mixing
Final video ready for delivery