Uploading Custom Scripts in Excel or CSV format
Uploading original script during project creation
Step 1. Open project creation
Go to Projects and click Create new project
Step 2. Locate the Original transcript option
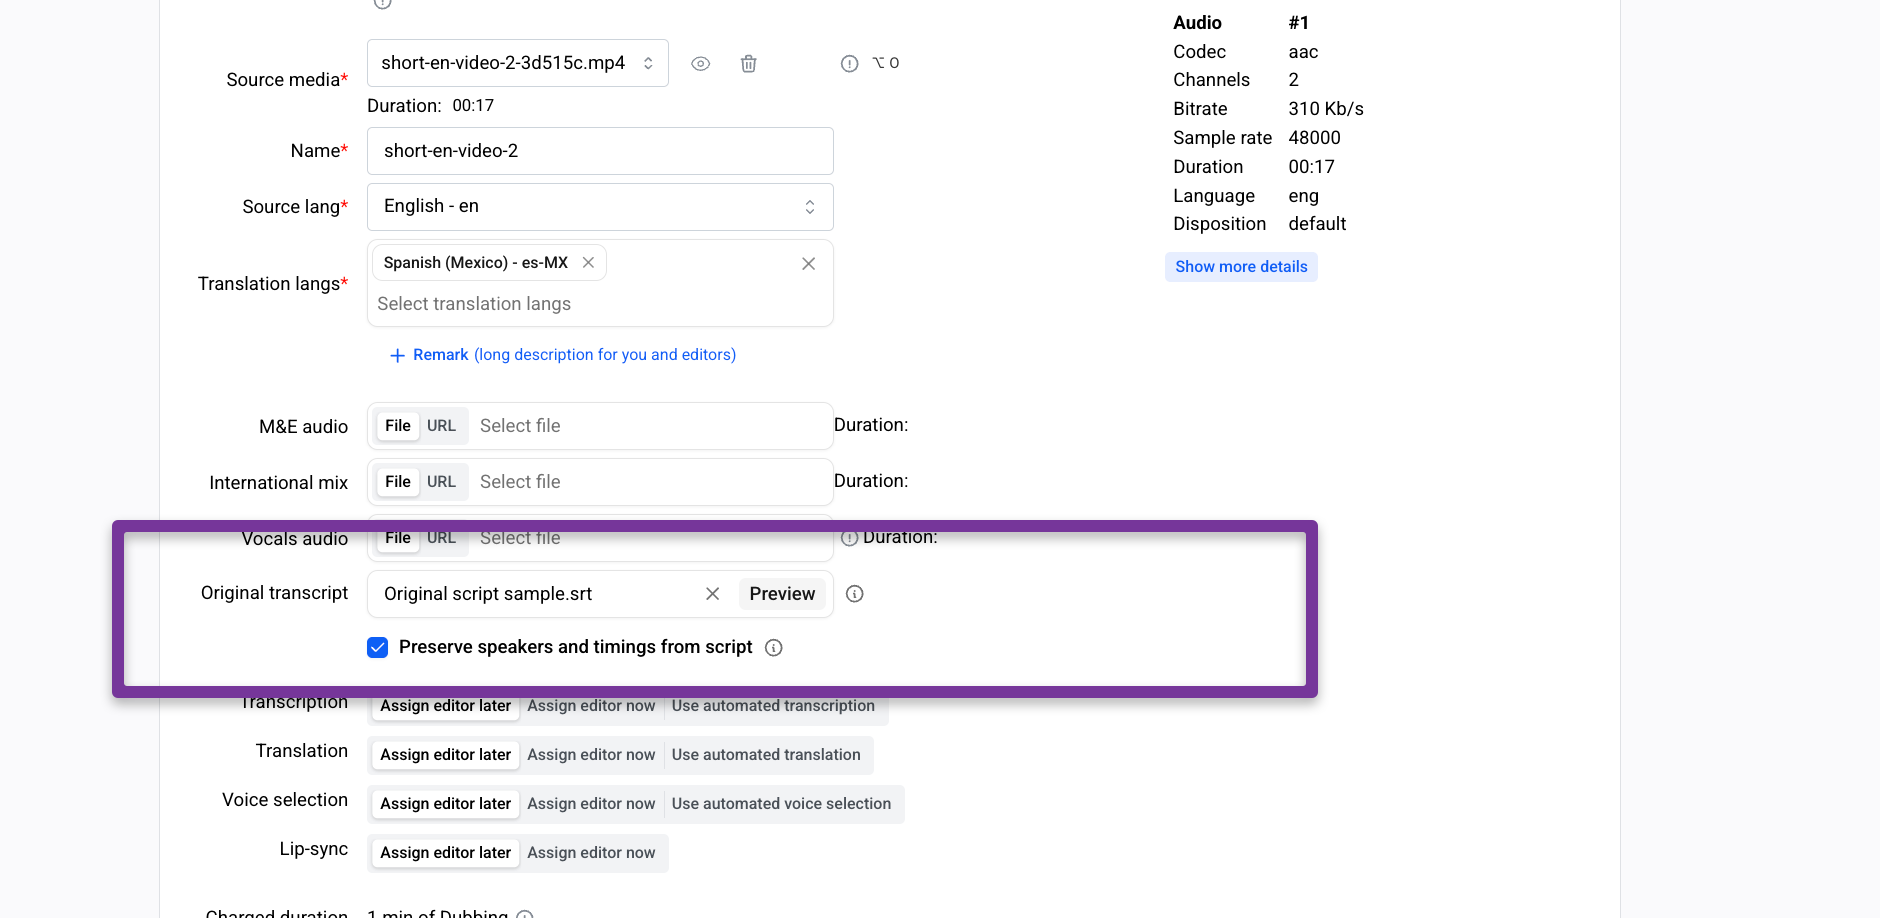
In the Create new project window, find the Original transcript field.
When uploading an original transcript in Excel or CSV format, you can pass extended metadata such as timings, speakers, and frame rate.
Use this file as an example of valid script
Original script example.xlsx
9.1 KB• Spreadsheet
Step 1. Upload the file
Upload your .xlsx or .csv file in the Original transcript section.
Step 2. Select the data source
If your file contains multiple sheets:
Select the sheet that contains the transcript data.
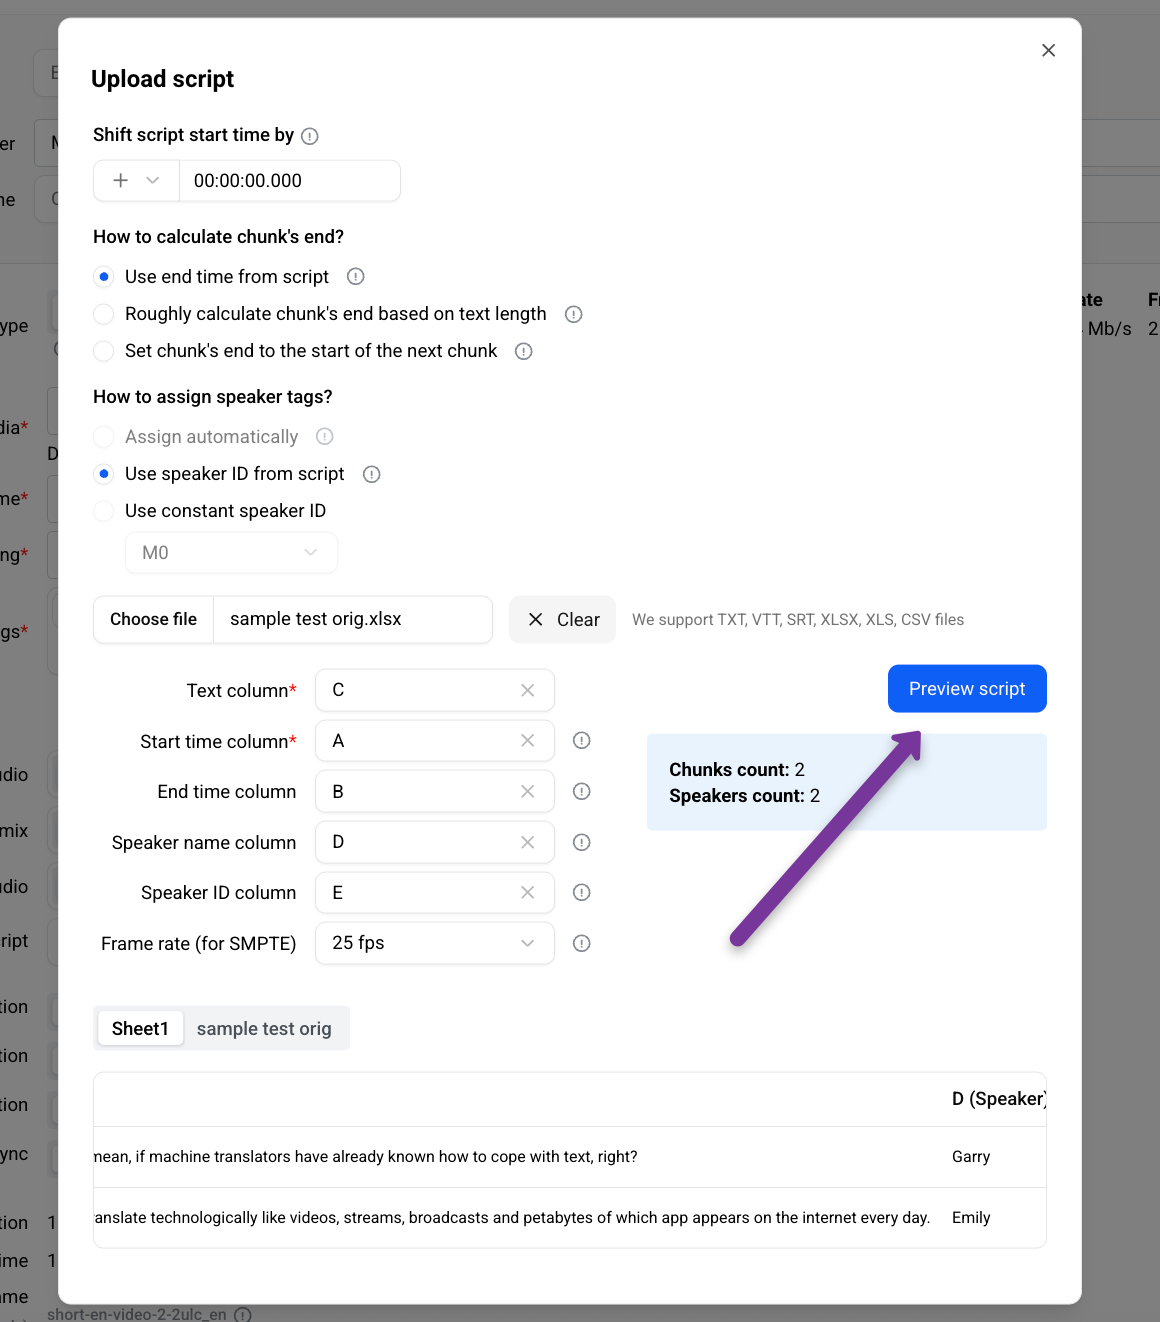
Step 3. Map columns
Specify which columns should be used for each parameter:
Text column* — the dialogue or narration text
Start time column* — start time of the segment
End time column — end time of the segment
Speaker name column — speaker name or label
Speaker ID column — speaker identifier
Frame rate (for SMPTE) — frame rate used for timecodes
If a parameter is not present in your file, leave the corresponding field empty.
Step 4. Preview the script
Click Preview script to see how the transcript will be imported and structured in Studio.
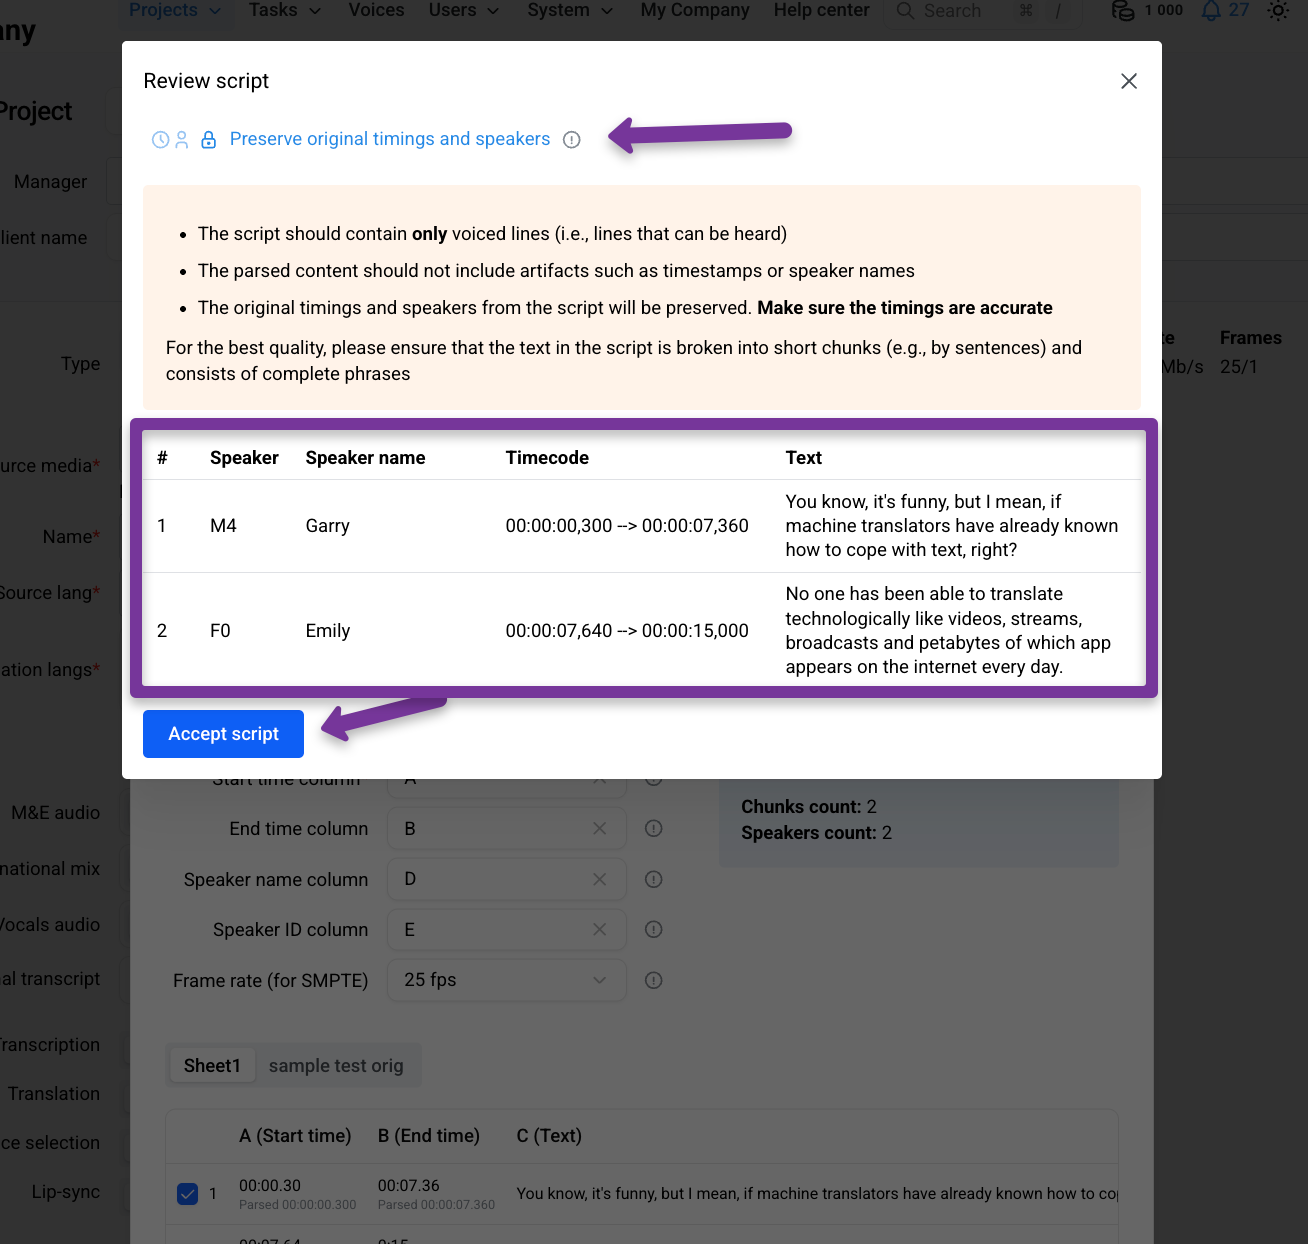
Step 5. Preserve timings and speakers
If you want Studio to use the timings and speaker tags from your script, enable Preserve timings and speakers.
This ensures that:
Original timecodes are kept
Speaker assignments are not recalculated
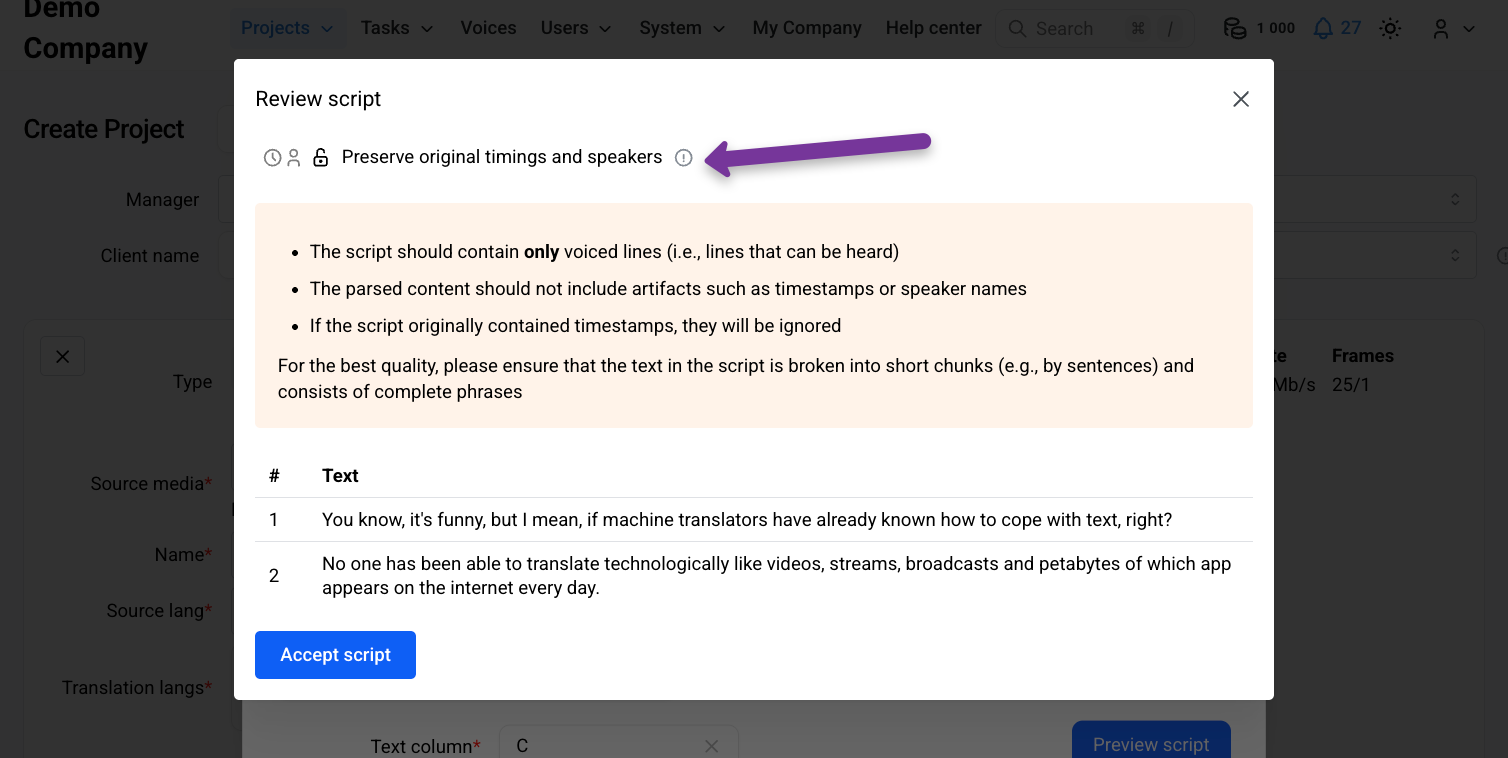
Step 6. Review and confirm
Review the preview carefully:
Check text segmentation
Verify timings and speaker assignments
If everything looks correct, click Accept.
Step 7. Create the project
Complete project creation.
The uploaded transcript will be used as the source script during transcription and subsequent stages
Upload an Original Script During Transcribing
You can also upload your original script inside the Transcribing task and compare it with the automatic ASR result.
How to do it
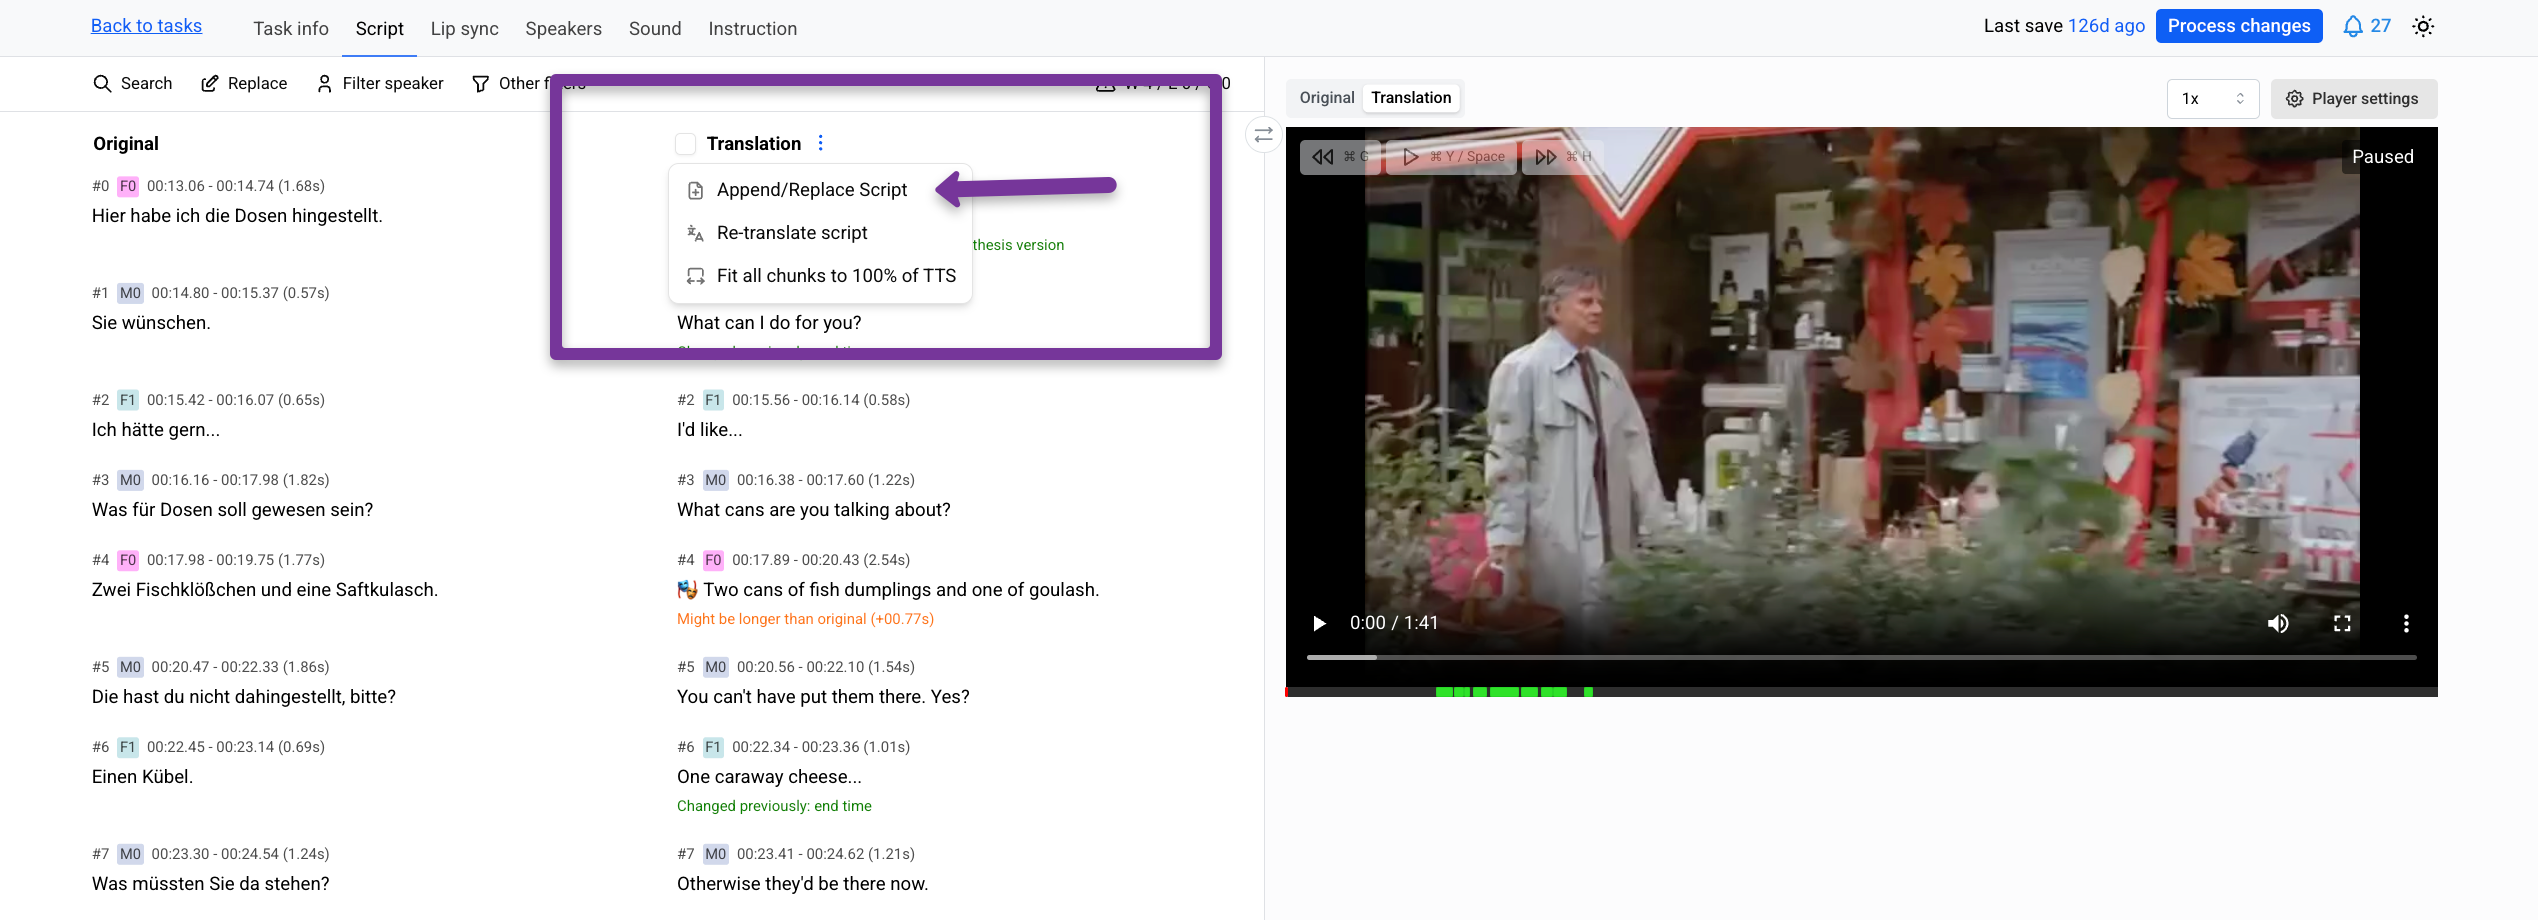
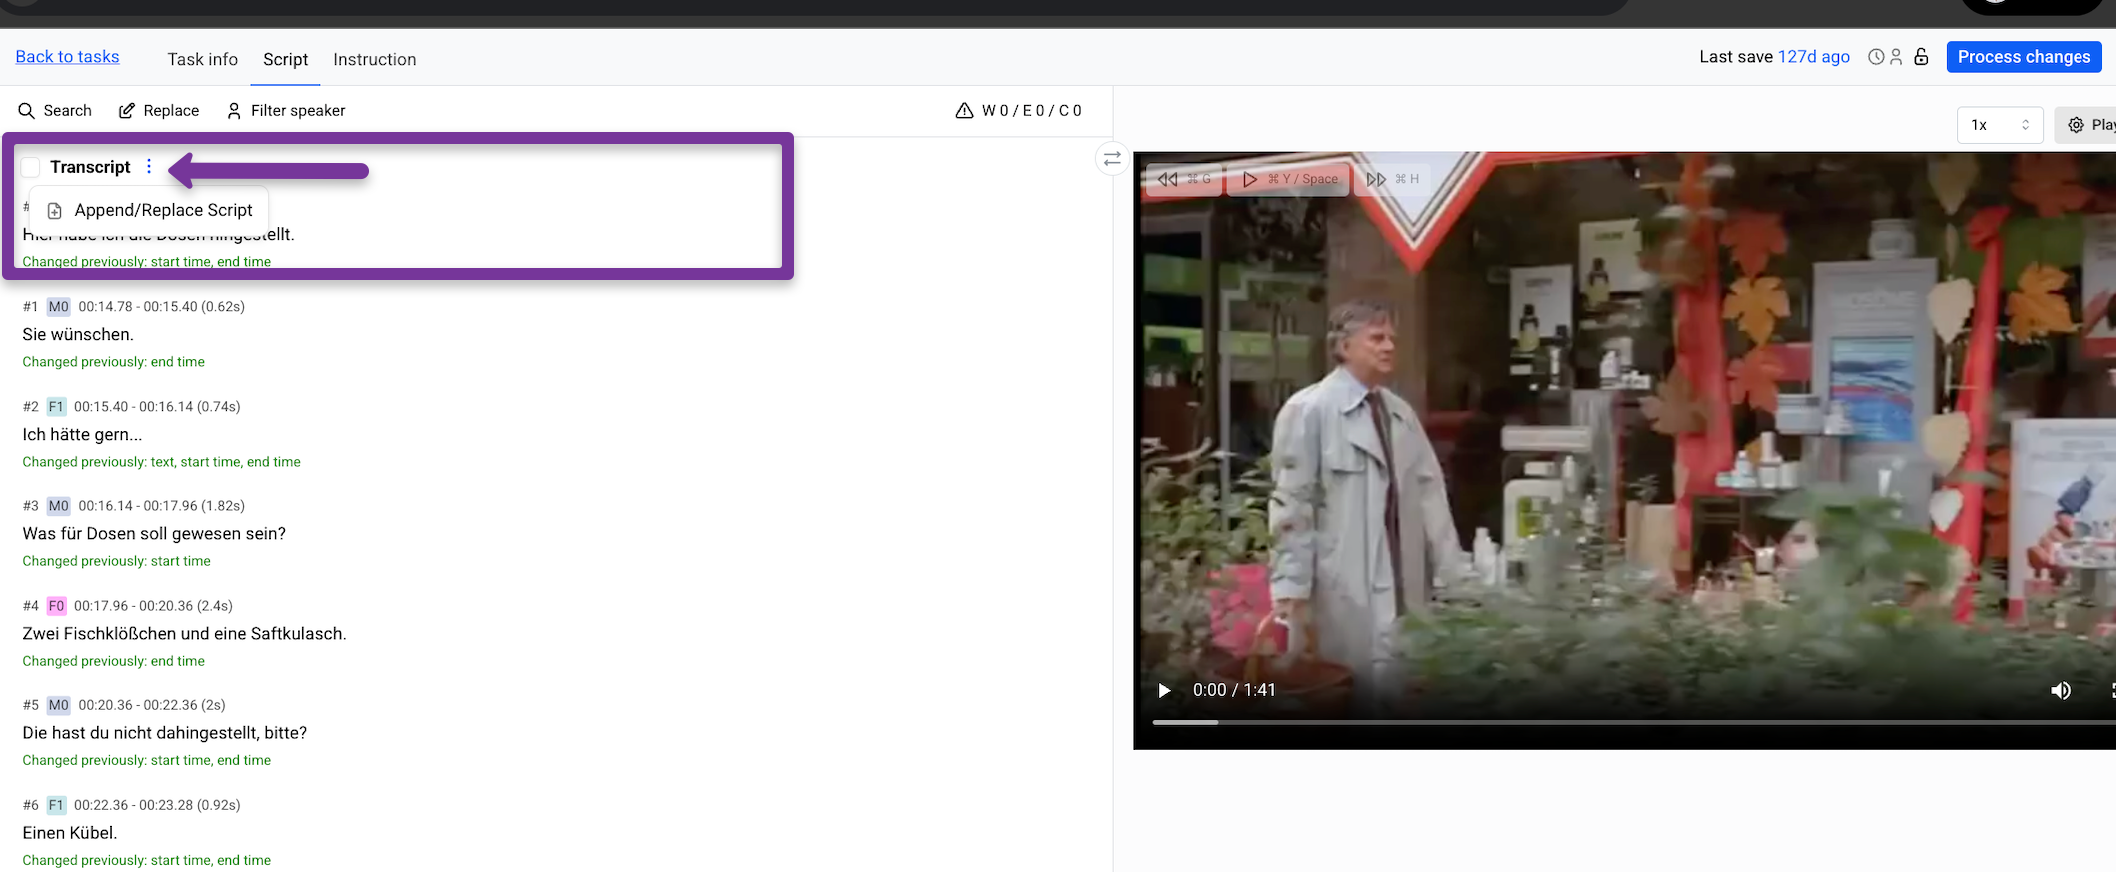
Open the Transcribing task.
Click the three dots menu.
Select Append / Replace script.
Upload your file and review the comparison.
Click on the lock icon to preserve timings and speakers from the uploaded script.
Upload a Translated Script at Later Stages
A translated or custom script can be uploaded during the following tasks:
Translation
Subtitling
Prooflistening
Lip-sync
How to do it
Open the task.
Click the three dots menu.
Select Append / Replace script.
Upload your file and review the comparison.